

How to avoid razor burn, red dots and ingrown hairs
Many men today see classic wet shaving as a necessary evil – a challenging daily battle against painful irritation, burning and the socially bothersome red dots that often appear on the neck. But the truth is that a well-executed wet shave should never have to hurt or leave the skin unbalanced. If your skin feels like a burning battlefield after your morning routine, it’s rarely because your skin is “extremely sensitive” by nature. Rather, it’s about your technology, or the modern plastic tools you use, actively working against your skin’s natural biological structure and the direction of hair growth.
By returning to the basics of traditional wet shaving, you can control every step and minimize wear and tear on your skin. In this deep dive, we’ll go over everything from the complex anatomy of the skin to the professional tricks and products that transform your shave from a stressful pain to a luxurious, meditative signature routine that is both seen and felt.
Why does irritation occur?
Before we get into the practical solutions, we first need to understand the underlying reason why the skin reacts so strongly. In an incorrectly performed wet shave, razor burn occurs when the razor not only cuts off the unwanted hairs, but also scrapes away the outermost protective layer of skin cells, the so-called stratum corneum. When this natural barrier protection is damaged, the underlying tissue is exposed, causing the skin to immediately become red, inflamed, and extremely susceptible to bacteria. A correctly executed wet shave instead aims to minimize this friction through the right glide and angle.
Red dots, in turn, are often synonymous with the medical condition pseudofolliculitis barbae – better known as ingrown hairs. This painful phenomenon affects many people who practice wet shaving with the wrong technique and happens when the hair is cut off too deep below the surface of the skin, or at an unfortunate angle. The result is that the straw retracts and begins to grow inwards into the skin instead of out through the pore opening. The body then identifies the ingrown hair as a foreign body, triggering a local inflammation that manifests as red, tender bumps.
Step 1: Face Mapping – Get to Know Your Face
This is arguably the most critical step for a successful wet shave, but unfortunately, it’s also the step that 90% of men completely skip. To achieve a perfect result, you need to realize that your beard hairs don’t grow in a uniform, uniform direction over the entire face. While the hairs on the cheeks often grow straight downwards, the reality on the neck is significantly more complex; Here, the hairs can grow in circular patterns, diagonally out towards the ears or even straight up towards the chin. Mastering your personal hair growth chart is the cornerstone of any professional wet shaving.
Here’s how:
To carry out a proper analysis, you should let the beard grow out for at least two days so that the direction is clear. Then run your fingertips over the skin in several different directions and feel:
- With the Grain: When your finger glides smoothly and your hair feels soft and pliable, follow the direction of growth. This is your starting point for a gentle wet shave.
- Against the Grain: When it feels rough, prickly and offers clear resistance, move against the direction of the hair.
The strategy:
The absolute basic rule of your routine is that your first round with the planer should always be done with the hair. This effectively shortens the length of the hairs without lifting or pulling on the skin, drastically reducing the risk of micro-ulcers. If you are aiming for an even closer and extremely smooth shave, you can apply new lather and make a second round sideways (across the grain). However, you should be very restrictive with, or completely avoid, direct counter-hair shaving on known problem areas such as the neck, as it is the most common cause of inflammation.

Step 2: The Science of the Razor Blade – Soft vs. Sharp
Once you’ve taken the plunge and switched to a classic safety razor, you’ll quickly discover a new world of precision: not all razor blades are created equal. In traditional wet shaving, the choice of blade is actually just as important as the choice of razor. For a beginner with sensitive skin, the right blade can be the difference between a successful experience and a skin disaster. Double-razor blades are generally divided into two main categories based on their character: sharp (aggressive) and soft (mild).
Sharp blades (e.g. Feather)
These blades are extremely sharpened and represent the pinnacle of sharpness in wet shaving. The advantage of a high-quality sharp blade is that it cuts through even the coarsest beard hairs with an absolute minimum of resistance, almost as if they were butter.
- For whom: Experienced users with heavy or very coarse beard growth who have full control over their technique.
- Risk of sensitive skin: If your technique isn’t perfect, or if you accidentally press even the slightest bit against your skin, a very sharp blade will shave off too much of the protective layer of skin. This inevitably leads to immediate razor burn and small wounds.
Soft blades (e.g. Derby, Astra Superior Platinum)
These blades often have a different sharpening angle or are provided with special coatings of, for example, platinum or Teflon. These properties make the blade feel significantly “kinder” and more supple to the skin during your wet shave.
- For whom: Beginners who are just learning the right angle, as well as for men with thin or very sensitive skin.
- The advantage: A softer blade is forgiving of small mistakes in the angle and does not “scrape” the skin surface as aggressively as the sharpest alternatives. This gives a significantly more pleasant and safe feeling, although in some cases it may take an extra pull to achieve a completely mirror-like finish.
Pro tip:
If you have a combination of sensitive skin but a coarse beard, you should aim for a blade in the middle layer (such as Astra) combined with a razor that has a “mild” exposure. In quality shaving, it is always better to use an effective blade and make two calm, controlled strokes than to use a blade that is too dull and forced to pull the razor ten times over the same sensitive area – the latter is an absolute guarantee of severe irritation.

Step 3: The Pre-Shave
One of the most surprising facts in men’s care is that a completely dry beard actually possesses the same mechanical strength as a copper wire of the same thickness. Trying to cut through thousands of such “metal wires” without preparation is an impossible task for the skin. The key to a successful wet shave lies in breaking down this resistance; When the hair becomes properly saturated with water, it swells and becomes up to 30 percent softer, allowing the blade to glide through with minimal effort.
Heat and moisture:
The absolute best way to start your wet shave is to shave right after, or even during, a hot shower. The hot steam serves a dual function: it softens the keratin (the proteins that build up the hair) and helps to open the pores, exposing more of the hair to the razor.
Cleaning:
Before applying any shaving products, you should use a gentle face wash. This step is crucial for removing dirt, dead skin cells, and excess oils. If left on the skin, these can quickly clog the space between razor blades, impairing the razor’s effectiveness and forcing you to apply unnecessary pressure.
Pre-Shave Oil:
For those who want to take their wet shave to a professional level, a high-quality pre-shave oil is indispensable. This oil settles as an invisible, microscopic protective film over the skin’s surface. Its primary function is to drastically reduce friction and act as a lubricant that helps the razor glide smoothly over the contours of the face instead of “snagging” or sticking to the skin, which is the main cause of small wounds.
Step 4: The lather – Skip the spray can
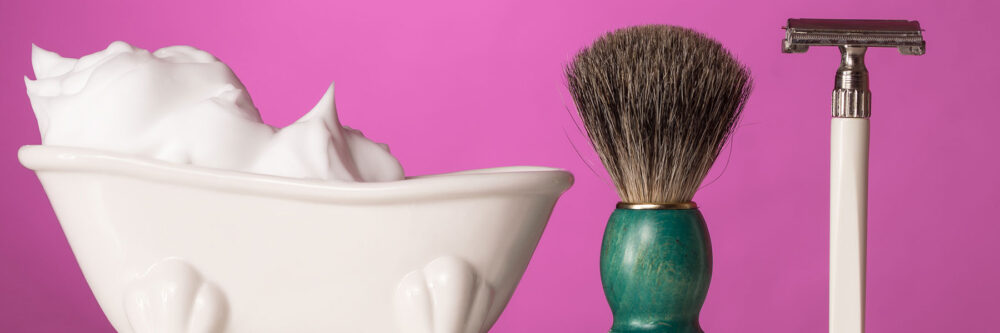
Unfortunately, most cheap shaving foams and gels sold in compressed air cans in grocery stores often contain propellants and drying alcohol ingredients. While these substances act as foamers, they also draw moisture out of both the skin and the beard hairs, making them stiff and more difficult to cut off. For a genuinely irritation-free wet shave, you should instead invest in a real, artisanal shaving soap or a high-quality shaving cream. These products are specially formulated to create a dense, creamy and stable lather that gives the skin the protection and hydration it needs during the process.
The Shaving Brush
Your most important tool In traditional wet shaving, the shaving brush is not just an accessory, but a central part of the technology. When you work up and apply the lather with a brush made of badger hair or synthetic fibers, you do more than just distribute the soap:
Lifts the hairs:
The circular motions of the brush help to gently lift the hairs from the skin’s surface and encapsulate them in lather. This is crucial for the razor blade to be able to cut the hair cleanly and efficiently at the base, instead of the razor just gliding over a lying hair.
Exfoliation:
While the brush softens the beard, it acts as a gentle mechanical exfoliator that exfoliates away dead skin cells. By clearing out these cells, you reduce the risk of them clogging the pores or hindering the plane’s progress.
The result of using a brush and a good soap is a much more gentle wet shave where the skin is left soft, balanced and above all free from the irritations that can foam often leaves behind.

Step 5: The technology – No pressure!
A classic safety razor (Safety Razor) is without a doubt your absolute best friend in the fight against ingrown hairs and chronic skin irritation. The reason is simple but ingenious: it uses only a single, high-quality razor blade that cuts the hair cleanly and precisely right at the skin’s surface. This is in stark contrast to modern multi-blade systems based on a “lift-and-cut” technology. There, the first leaf pulls the hair out of the pore so that the subsequent leaves can cut it below skin level. When the straw then retracts and is about to grow back, it often gets stuck under the skin and causes the inflammation we feel as red dots. By switching to traditional wet shaving with a safety razor, you eliminate this problem at the source.
Mastering the technique requires you to embrace three golden rules:
No pressure:
This is the most important change for those who are used to plastic planers. A metal safety planer is designed with a natural weight. Your task is to let the plane’s own weight do the work against the skin. Applying manual pressure will force the blade into the skin tissue, which is the main cause of razor burn.
The angle:
Unlike modern planers with moving heads that compensate for your movements, a safety planer requires you to keep the right angle yourself. Aim to hold the razor at about a 30-degree angle to the surface of the skin. It provides the most effective cut-off and minimizes wear and tear on the skin during your wet shave.
Short, controlled moves:
Avoid pulling the razor in long strokes over the entire cheek or neck. Instead, use short strokes of a few centimeters at a time. This gives you maximum control over the angle and pressure. Also, remember to rinse the blade frequently in warm water to keep it free of hair and soap residue, ensuring that every move is as effective as possible.
Mastering these steps takes a few times, but the reward of a painless and perfectly smooth wet shave is worth every second of learning.

Step 6: Post-Shave
Once you have put down the planer, the process is not yet completely complete; How you choose to finish your wet shave is absolutely crucial to how your skin will feel and look for the rest of the day. The purpose of aftercare is to soothe the stressed tissue, disinfect any micro-wounds and restore the moisture balance that the shave has disturbed.
Shock with cold:
The first step after finishing shaving is to rinse your face liberally with ice-cold water. While heat was used before shaving to open the pores, the cold water acts as a signal to the skin to contract and close the pores again. This helps to calm blood flow to the surface of the skin and immediately dampens the heat that can sometimes occur after a close wet shave.
The Alum Stone, Nature’s Own Miracle:
One of the most underrated products in traditional wet shaving is the alum stone. Sprinkle a slightly dampened alum stone over the areas you have just shaved. Alum is a natural salt mineral with powerful antiseptic properties. It acts as an astringent, which means that it contracts the skin tissue immediately. If you have a small bleeding cut, it stops the bleeding in seconds and at the same time prevents bacteria from causing future inflammations or red spots.
After Shave Balm:
As the final, sealing step, you should always apply a high-quality After Shave Balm. Unlike the high-alcohol aftershave water of old, which often dries out and irritates more than it helps, a modern balm should be alcohol-free. Look for ingredients like Aloe Vera, which cools, or witch hazel, which is known for its healing properties. This helps to rebuild the skin’s natural barrier and leaves the face soft and protected after your wet shave.