Easter is here, the eggs are painted and the smell of roast lamb is starting to waft from the kitchen. But you’ve forgotten the spring raking: the stump looks more like an overgrown, sprawling Easter rice bush than the elegant, well-groomed look you were aiming for. With guests practically at the door and a timetable bursting at the seams, panic is setting in.
Many people think that wet shaving with a safety razor is a time-consuming ritual-like project that requires at least half an hour in the bathroom. But don’t worry – in war and Easter dinners, everything is allowed, even an effective “shortcut”.
Is it really possible to get a good wet shave with a safety planer when the clock is ticking? The answer is a resounding yes. It may not be a time-consuming three-pass “BBS” (Baby Butt Smooth) with a perfect finish, but you’ll look well-groomed, smell amazing and, most importantly, avoid the irritation that often comes from rushing with the wrong technique. Here’s your emergency plan for a quick but stylish Easter wet shave!
What you need for your spring cleaning?
Before you start the clock, make sure you have the following ready on the sink edge. The key to speed is to avoid searching in the cupboards.
Shaving tools
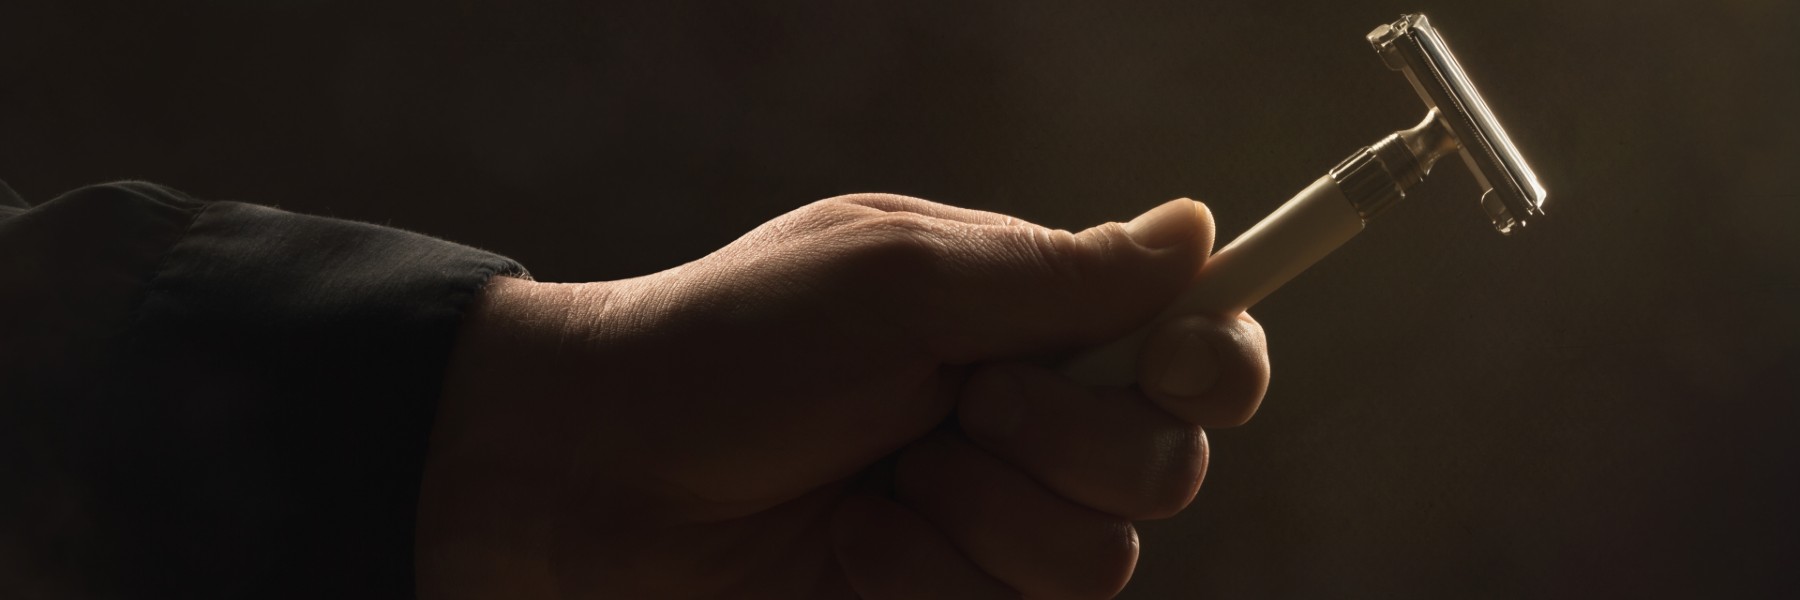
Safety razor: Preferably a medium-aggressive model that takes a lot of beard hairs in the first pass. Keep it in a rack so you know where it is. The most important tool for your wet shaving.
A new razor blade: A sharp razor blade that has a slightly more aggressive edge is essential when you’re in a hurry to shave, a dull blade requires more strokes and creates irritation.
Shaving brush: Synthetic brushes are best here because they don’t need to be soaked beforehand and dry quickly. Always in a stand. You can also use a shaving stick or cream that doesn’t require a shaving brush. Then you apply it with your fingers only.
Shaving products
Shaving cream (rather than hard soap): A cream in a tube lathers faster than a hard soap when every second counts. You may also want to choose a
Aftershave Balm: Choose a moisturizing and cooling version to quickly reduce any redness before you sit down at the table.
Alum pin / Alum block: Your best friend in case of stress. It stops bleeding immediately if your hand slips on the move. Also looks better than cardboard pads.
Now you have everything you need for your wet shaving.
Minute 1: Quick prep - The foundation for an irritation-free wet shave
Forget the long, relaxing shower where you let the steam do the work for ten minutes. When guests approach the driveway, we get straight to the point, but remember: speed should never mean carelessness with the moisture. Shaving on dry skin with a safety razor is asking for razor burn, and that’s not a look to match your best Easter shirt.
Step 1: Warm water – Nature’s softener (30-45 seconds)
Start by turning on the tap to a properly warm (but not scalding) temperature. Cup your hands and rinse your face repeatedly for at least 30 seconds.
Why do it? The heat and moisture do two things at once: they open up the pores and – most importantly – they soften the keratin in your beard hairs. A moist beard is much easier for the razor blade to cut through than a dry and brittle one that resists. By taking these seconds to wet your face thoroughly, you reduce the risk of the razor ‘nicking’ your skin.
Step 2: Preshave – Your invisible life insurance (15 seconds)
Do you have a pre-shave cream or shaving oil in your cupboard? Now is the time to get it out. Apply a small dab and massage it in quickly with circular movements towards the beard growth.
Glide and protect: Preshave products create a micro-thin protective film between the skin and the blade. When we move faster than usual with the planer, this provides that extra glide needed for the blade to sail over bumps instead of getting stuck.
Menthol effect: Many pre-shave creams contain menthol or eucalyptus, which gives a fresh feeling that revitalizes both you and your skin for the Easter celebrations.
Quick tip: If you don’t have a dedicated pre-shave, use a dab of regular hair conditioner on the stubble while you get out the razor for the wet shave, it softens the strands surprisingly effectively in an emergency!
Now that your skin is prepared, it’s time for the step that many think takes the longest: the lather. But forget the image of standing and whisking in a porcelain bowl for ages until you’ve created the perfect, stiff foam. With Easter dinner looming, we can’t afford the fuss. Now it’s all about facial application – a technique that not only saves time but actually provides a better wet look for certain skin types.
Step 1: Charge the brush (20 seconds)
Soak your shaving brush under the tap. If you’re using a synthetic brush, a quick dip is enough; if you’re using badger or hog bristles, shake out most of the water so it’s damp but not dripping.
Straight from the source: Dip the brush directly into the soap box or squeeze an almond-sized amount of shaving cream directly into the center of the brush. Rotate the brush with some pressure for about 15-20 seconds until the brush is thoroughly saturated with product. You want to see the beginnings of a dense lather already here.
Step 2: Work the solder onto the skin (40 seconds)
Now go directly to the face. Use circular, vigorous movements over the cheeks, chin and neck.
Double effect: by lathering directly on the face, you simultaneously massage the soap under the beard hairs and lift them off the skin. This allows the razor to get better access to the root. If the lather feels too dry or sluggish? Just dip the top of the brush in some warm water and keep massaging.
The target image: You’re not aiming for a perfect, fluffy “pastry meringue” for a photo on Instagram. Your goal is a dense, creamy, glossy film that covers every millimeter of the area to be shaved. As long as the skin doesn’t show through and it feels smooth under your fingers, you’re ready for the wet shave.
Why facial application? In addition to eliminating the need to wash a shaving bowl, the bristles of the brush help to exfoliate the skin and stimulate circulation, resulting in a healthier appearance just in time for the first Easter bells (or in-laws) to ring the doorbell.
Minute 3 & 4: The actual daring - The strategy behind "The Single Pass"
Now we step into the absolute core of the process. As the clock ticks and guests approach, the temptation is to start “stress-shaving” with quick, jerky movements. Resist that impulse. In wet shaving, the motto is: Slow is smooth, and smooth is fast. Being methodical saves you time because you don’t have to go back and correct mistakes – or even worse, dress wounds.
Step 1: Focus on fellow human beings
Forget that silky smooth feeling you get from shaving your head. Today, we’re aiming for an “approved” and stylish look that will last for an Easter dinner.
Why just one pass? Just shaving with your hair will remove 80-90% of stubble. That’s more than enough to keep you looking clean-shaven and fresh. Plus, you drastically minimize the risk of skin irritation and ingrown hairs. It’s better to be 90% smooth and look calm in your skin, than to be 100% smooth but flushed like a boiled crayfish at the dinner table.
Step 2: Master the angle and pressure (30-degree rule)
A safety planer is not like a modern system planer with a moving head; you are the architect of the angle.
Find the angle: Place the head of the razor against your cheek and angle the handle downwards until you feel the blade make contact with your skin. It usually lands at about 30 degrees.
Zero pressure: This is the most important rule for a trouble-free wet shave. Let the weight of the razor itself do the work. If you push too hard when you’re stressed, the blade will dig into the skin instead of gliding on top. Think of it as just “sweeping” the lather away, and the hair will follow on its own.
Step 3: Sweeping, methodical moves
Instead of short, choppy movements, use long, smooth strokes during the wake-up call.
The neck is critical: Take extra care at the Adam’s apple and neck where hair often grows in different directions. Stretch the skin slightly with your free hand to create a flat surface for the blade.
Rinse often: A clogged blade will not shave effectively. Rinse the razor in warm water after every two or three strokes to keep the blade clean and ready for the next sweep.
Shavingroom insight: If you find an area you missed completely, apply a dab of residual lather from the brush before you pull the razor again. Never shave completely bare skin, even under time pressure!
The bell is ringing at the door! Now it’s time for that last, critical minute where we turn a quick wet shave into a professional finish. This minute is all about calming your skin, hiding any imperfections and making sure you smell as fresh as a spring day in April.
Step 1: The ice cold shock (20 seconds)
After rinsing off the last remnants of lather from the wet shave with lukewarm water, turn the tap as far to the cold side as possible. Cup your hands and splash plenty of ice-cold water over the entire shaved area.
Why the cold? The cold water acts as a natural astringent. It closes the pores, softens the natural redness caused by wet shaving and gives the skin an immediate firming effect. It is also the quickest way to ‘wake up’ your face after a stressful day in the kitchen or preparing for Easter.
Step 2: The Alum Pin – Your hidden superpower (15 seconds)
Even the best of them can slip during the wet shave when time is short. If you see a small red dot (a “nick”) on your chin or neck, there’s no point in trying to dab it with toilet paper that then sticks to your face.
Immediate effect: wet the top of your alum stick and press it lightly against the bleeding for a few seconds. It may sting a little, but the alum salt will immediately constrict the blood vessels and stop the bleeding. Then rinse off any remaining salt with a little water so that it doesn’t leave a white stain. Now no one will see that you were in a hurry during the wet shave!
Step 3: After Shave Balm – Moisturizing before alcohol (25 seconds)
After a quick shave, your skin is extra sensitive. Skip the traditional, alcohol-infused after-shave splash today to finish your wet shave, as it can dry out and irritate already stressed skin.
Soothing care: Massage in a high-quality After Shave Balm. A balm works like a moisturizer with soothing ingredients like aloe vera, chamomile or witch hazel. It goes into your skin instantly, removing that tight feeling and giving you a healthy glow without making you look shiny or greasy.
The scent: Choose a balm with a subtle but masculine scent of sandalwood, citrus or cedar. It provides a subtle scent aura that impresses at the dinner table without taking over from the Easter meal.
Final words: Now you are ready! Look in the mirror, straighten your back and smile. In just five minutes, you’ve gone from wildly overgrown to well-groomed after a lovely wet shave. You’ve saved time, avoided irritation and are ready to enjoy Easter dinner in style. Happy Easter!
ShavingWall is Shavingroom.se blog that covers classic wet shaving and beard care in three different departments.
Shaving blog where we bring up news and tips in wet shaving and beard care.
ShavingBrand where we present a brand once a month.
ShavingTest where we test different products.
At Shavingblogg, we talk about everything that has to do with wet shaving and beard care
Wet shaving means shaving with a safety razor, shavette or razor together with a shaving brush and shaving cream or shaving soap. What should you consider when buying your first safety razor, shavette or razor? What type of shaving brush should you choose? Should you choose shaving cream or shaving soap?
Beard care means caring for your beard and mustache. Is beard oil good for your beard and why should you choose it? Which mustache wax is right for you? Do you really need a beard shampoo? Time to start thinking about beard color.
We like both classic traditional timeless brands and new exciting brands from all corners of the world. You can read about these in ShavingBrand.
We don’t just think it’s fun to sell the stuff. We also use them and test them to say what we think of them.
Free Shipping
On orders above €189
Fast Delivery
2-5 day delivery
Same Day Dispatch
On orders before 16:00
Secure Payments
Klarna / Swish / MasterCard / Visa
Switching language?
You've switched the language and there are items in the cart. If you keep the English language, the cart will be emptied and you will have to add the items again to the cart.